这篇教程PyMySQL实现增删查改的简单使用写得很实用,希望能帮到您。
我们在使用MySQL的时候,可以在MySQL的客户终端来操作数据库中的表,同时,也可以使用navicat等可视化的工具来操作数据表。但是,这只是操作个别数据,如果我们想要插入10万条数据,那肯定就不能这么做了。
我们可以通过程序写一个循环来自动插入,因此,PyMySQL就是使用python语言来直接操作数据库的一个接口。
明确了这一点,我们再开始介绍PyMySQL包: 1、PyMySQL的使用步骤: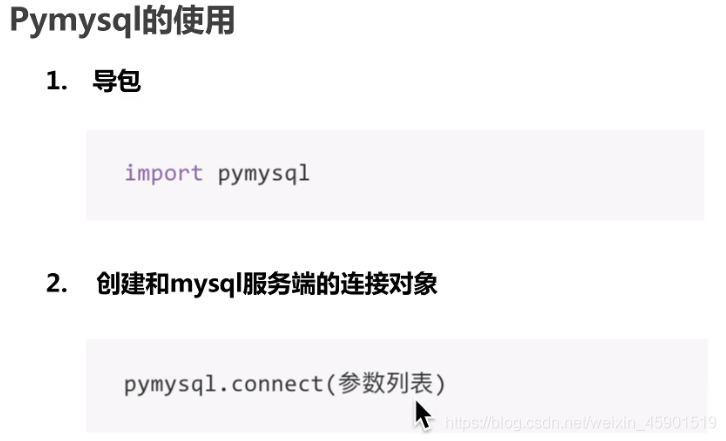


2、案例:2.1 查询数据库中的表的信息: # 需求:查询数据库person中info表的信息 # 1.导包import pymysqltry: # 2.连接MySQL数据库的服务 connc = pymysql.Connect( user="root", # The first four arguments is based on DB-API 2.0 recommendation. password="4412", host='127.0.0.1', # mysql服务端的IP,默认是127.0.0.1/localhost,或者写真实的ip database='person', port=3306, charset="utf8") # 3.创建游标对象 cur = connc.cursor() # 4.编写SQL语句 sql = 'select * from info;' # 5.使用游标对象调用SQL cur.execute(sql) # 6.获取查询的结果 result= cur.fetchall() print(result) # 7.关闭游标对象 cur.close() # 8.关闭连接 connc.close()except Exception as e: print(e) 运行结果:

2.2 增加数据: 大部分的步骤都和前面一样,直接在程序中注释看:
# 需求:# 增加数据 刘德华56 男 数据 到 数据库person--的info表中# 修改数据 小王 的名字为 小王吧 到 数据库person--的info表中# 删除数据 张三 数据库person--的info表中# 1.导包import pymysql# 2.连接MySQL服务connc = pymysql.Connect( user="root", # The first four arguments is based on DB-API 2.0 recommendation. password="4412", host='127.0.0.1', # mysql服务端的IP,默认是127.0.0.1/localhost,或者写真实的ip database='person', port=3306, charset="utf8")# 3.创建游标对象cur = connc.cursor()try: # 4.编写、增加、删除的SQL语句 # 增加数据 刘德华 56 男 sql = 'insert into info values(%s, %s, %s, %s)' add_data = [0,"刘德华", 56, "男"] # 5.使用游标对象执行SQL语句 cur.execute(sql, add_data) # 6.提交操作 connc.commit() except Exception as e: print(e) # 操作失败,数据回滚 connc.rollback() finally: # 7.关闭游标对象 cur.close() # 8.关闭连接 connc.close()print("结束!")运行之后,看看person数据库中 表info 的数据,确实增加成功了: 
2.3 修改数据: # 需求:# 增加数据 刘德华56 男 数据 到 数据库person--的info表中# 修改数据 小王 的名字为 小王吧 到 数据库person--的info表中# 删除数据 张三 数据库person--的info表中# 1.导包import pymysql# 2.连接MySQL服务connc = pymysql.Connect( user="root", # The first four arguments is based on DB-API 2.0 recommendation. password="4412", host='127.0.0.1', # mysql服务端的IP,默认是127.0.0.1/localhost,或者写真实的ip database='person', port=3306, charset="utf8")# 3.创建游标对象cur = connc.cursor()try: # 4.编写、增加、删除的SQL语句 # 修改数据 李四 的名字为 李四的爸爸 sql = 'update info set name=%s where name="李四"' update_data = ["李四的爸爸"] # 5.使用游标对象执行SQL语句 cur.execute(sql, update_data) # 6.提交操作 connc.commit() except Exception as e: print(e) # 操作失败,数据回滚 connc.rollback() finally: # 7.关闭游标对象 cur.close() # 8.关闭连接 connc.close()print("结束!")运行之后,看看person数据库中 表info 的数据,确实修改成功了: 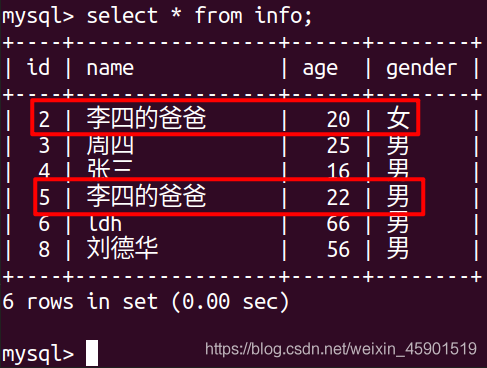
2.3 删除数据: # 需求:# 增加数据 刘德华56 男 数据 到 数据库person--的info表中# 修改数据 小王 的名字为 小王吧 到 数据库person--的info表中# 删除数据 张三 数据库person--的info表中# 1.导包import pymysql# 2.连接MySQL服务connc = pymysql.Connect( user="root", # The first four arguments is based on DB-API 2.0 recommendation. password="4412", host='127.0.0.1', # mysql服务端的IP,默认是127.0.0.1/localhost,或者写真实的ip database='person', port=3306, charset="utf8")# 3.创建游标对象cur = connc.cursor()try: # 4.编写、增加、删除的SQL语句 # 修改数据 李四 的名字为 李四的爸爸 sql = 'update info set name=%s where name="李四"' update_data = ["李四的爸爸"] # 5.使用游标对象执行SQL语句 cur.execute(sql, update_data) # 6.提交操作 connc.commit() except Exception as e: print(e) # 操作失败,数据回滚 connc.rollback() finally: # 7.关闭游标对象 cur.close() # 8.关闭连接 connc.close()print("结束!")运行之后,看看person数据库中 表info 的数据,确实删除成功了: 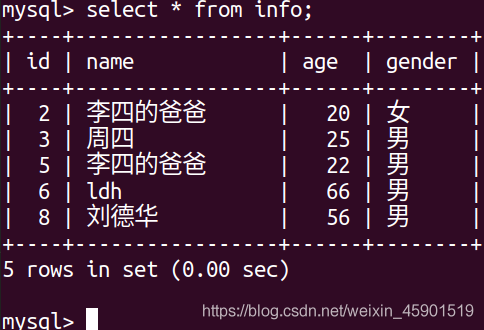
到此这篇关于PyMySQL实现增删查改的简单使用的文章就介绍到这了,更多相关PyMySQL 增删查改内容请搜索51zixue.net以前的文章或继续浏览下面的相关文章希望大家以后多多支持51zixue.net!
Pytorch BCELoss和BCEWithLogitsLoss的使用
基于BCEWithLogitsLoss样本不均衡的处理方案 |


